How to Change an Oven Light?
Changing an oven light bulb seems daunting, but it’s a simple task anyone can handle with the right guidance. A well-lit oven lets you check on your baking or roasting without opening the door, keeping your dishes cooking evenly. This guide walks you through the process of replacing an oven light bulb safely and efficiently. From gathering tools to picking the right bulb, we’ll cover every detail to make the job hassle-free. Expect practical tips, safety advice, and answers to common questions to ensure your oven shines bright again.
Why Change Your Oven Light?
A burnt-out oven light makes it tough to monitor your food. You might open the door too often, letting heat escape and messing with cooking times. Replacing the bulb restores visibility, so you can keep an eye on your dishes without disrupting the process. Plus, a working light enhances safety by helping you spot spills or messes inside the oven. Let’s dive into the steps to get that light back on.
Tools and Materials You’ll Need
Before starting, gather these items to streamline the process:
- Replacement bulb: Check your oven’s manual for the correct wattage and type (usually 40W appliance bulb, halogen, or LED).
- Screwdriver: A Phillips or flathead, depending on your oven’s screws.
- Gloves: Cotton or work gloves to protect your hands and keep the bulb free of oils.
- Towel or cloth: To wipe down surfaces or catch debris.
- Flashlight: To see inside the oven if the light is out.
Having everything ready saves time and prevents frustration during the task.
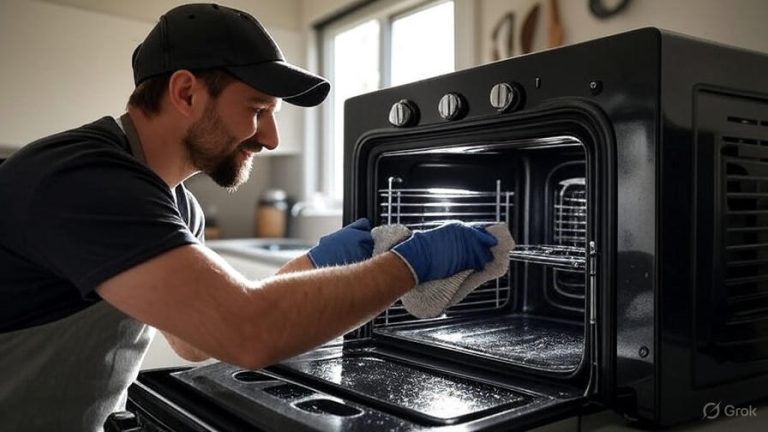
Step 1: Ensure Safety First
Safety comes first when working with any appliance. Start by unplugging the oven from the power outlet. If it’s hardwired, turn off the circuit breaker connected to the oven. This step prevents electrical shocks. Next, let the oven cool completely. A hot oven risks burns, especially since you’ll be reaching inside. Wait at least an hour after use to ensure it’s safe to touch.
Step 2: Locate the Oven Light
Find the light inside your oven. Most ovens have the bulb in the back, upper corner, or along the side wall. Some models cover the bulb with a glass shield or metal grate. Check your oven’s manual if you’re unsure. Use a flashlight to spot the bulb clearly, especially if it’s tucked in a tight spot.
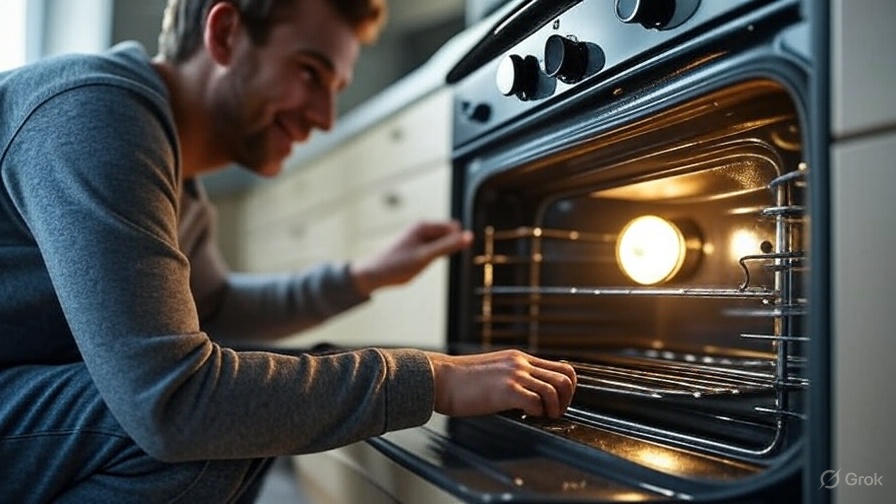
Step 3: Remove the Old Bulb
Now, let’s get that old bulb out. Follow these steps:
- Remove the cover: If your oven light has a glass cover or metal grate, take it off. Some covers twist off counterclockwise, while others require unscrewing with a screwdriver. Place the cover on a towel to avoid breaking it.
- Take out the bulb: Wear gloves to avoid touching the bulb with bare hands, as oils can shorten its lifespan. Twist the bulb counterclockwise to unscrew it. If it’s a push-in halogen bulb, gently pull it out of the socket.
- Inspect the socket: Look for dirt, corrosion, or damage in the socket. Wipe it clean with a dry cloth if needed. A damaged socket may need professional repair, so contact a technician if you notice issues.
Set the old bulb aside for proper disposal. Don’t toss it in the regular trash, as some bulbs contain small amounts of hazardous materials.
Step 4: Choose the Right Replacement Bulb
Picking the correct bulb ensures your oven works properly. Check the oven’s manual for specifications. Most ovens use a 40-watt appliance bulb with a standard E26 or E27 base. Some modern ovens use halogen or LED bulbs for better efficiency. Here’s what to consider:
- Wattage: Stick to the recommended wattage (usually 25W to 40W) to avoid overheating.
- Type: Appliance bulbs are designed to withstand high temperatures, unlike regular household bulbs.
- Base size: Match the base type (e.g., E26, G9 for halogen) to your oven’s socket.
- Brand compatibility: Some ovens, like GE or Whirlpool, recommend specific bulbs for optimal performance.
If you don’t have the manual, check the old bulb for markings or look up your oven model online. Buy from a reputable retailer to avoid low-quality bulbs that burn out quickly.
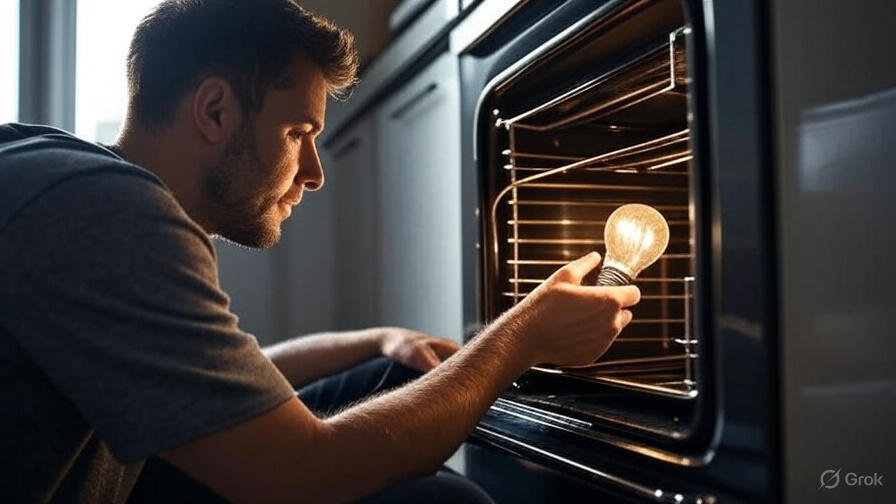
Step 5: Install the New Bulb
With the right bulb in hand, it’s time to install it. Here’s how:
- Wear gloves: Protect the new bulb from skin oils to extend its life.
- Insert the bulb: For screw-in bulbs, twist clockwise until snug but not overly tight. For push-in halogen bulbs, align the pins and gently push into the socket.
- Replace the cover: Reattach the glass cover or metal grate. Twist or screw it back into place securely.
Double-check that everything is tight and properly aligned to prevent issues later.
Step 6: Test the New Bulb
Plug the oven back in or turn on the circuit breaker. Switch on the oven light to confirm it works. If it doesn’t, try these troubleshooting tips:
- Check the bulb: Ensure it’s seated correctly in the socket.
- Inspect the power: Verify the oven is powered on and the breaker isn’t tripped.
- Test the socket: A faulty socket may need professional attention.
If the light works, you’re all set. If not, recheck your steps or consult a technician.
Step 7: Clean Up and Dispose of the Old Bulb
Wipe down the oven interior with a damp cloth to remove any debris from the process. Dispose of the old bulb properly. Many hardware stores or recycling centers accept appliance bulbs. Check local regulations, as some bulbs require special handling due to small amounts of mercury or other materials.
Tips for Maintaining Your Oven Light
Keep your oven light shining bright with these maintenance tips:
- Clean regularly: Wipe the glass cover during routine oven cleaning to prevent grease buildup.
- Check bulb lifespan: Replace bulbs every 1-2 years, even if they haven’t burnt out, to ensure reliability.
- Use quality bulbs: Invest in high-quality, oven-rated bulbs to avoid frequent replacements.
- Monitor usage: Turn off the light when not needed to extend bulb life.
These habits keep your oven functional and save you from frequent repairs.
Common Oven Light Problems and Solutions
Sometimes, changing the bulb doesn’t fix the issue. Here are common problems and how to address them:
- Bulb won’t turn on: Ensure the bulb is compatible and properly installed. Check the socket for damage or loose connections.
- Light flickers: A loose bulb or dirty socket might be the culprit. Tighten the bulb or clean the socket with a dry cloth.
- Cover won’t come off: If the cover is stuck, apply gentle pressure or use a rubber grip to twist it. Avoid forcing it to prevent breakage.
- Frequent burnouts: Using the wrong wattage or low-quality bulbs can cause this. Double-check specifications and buy from trusted brands.
If problems persist, contact a professional to avoid damaging your oven.
Why Oven Light Maintenance Matters
A working oven light isn’t just about convenience. It improves safety by letting you see spills, leaks, or food splatter that could cause smoke or fire hazards. It also helps you cook better by allowing you to monitor food without opening the door, which maintains consistent temperatures. Regular maintenance, like replacing bulbs and cleaning covers, keeps your oven in top shape.
How to Find Your Oven’s Manual
Lost your oven’s manual? Most manufacturers post manuals online. Visit the brand’s website (e.g., Samsung, LG, or Bosch) and search for your model number, usually found on a sticker inside the oven door or on the back of the appliance. The manual lists bulb specifications, safety tips, and troubleshooting advice specific to your oven.
Eco-Friendly Bulb Options
Consider switching to LED appliance bulbs for energy efficiency. LEDs use less power, last longer, and produce less heat than traditional incandescent or halogen bulbs. While they cost more upfront, they save money over time. Ensure the LED bulb is rated for high temperatures and fits your oven’s socket.
When to Call a Professional
Most oven light replacements are DIY-friendly, but some situations call for expert help:
- Damaged socket: Corrosion or broken wiring requires professional repair.
- Hardwired ovens: If you’re uncomfortable working with electrical systems, hire a technician.
- Complex designs: Some high-end ovens have intricate light assemblies that need specialized tools.
Search for certified appliance repair services in your area or contact the oven’s manufacturer for recommendations.
FAQs About Changing an Oven Light
Here are answers to common questions about replacing oven light bulbs:
How often should I replace my oven light bulb?
Replace it every 1-2 years or when it burns out. Regular replacement prevents unexpected failures.
Can I use a regular light bulb in my oven?
No, regular bulbs can’t handle oven heat and may shatter. Use appliance-rated bulbs only.
Is it safe to change the bulb myself?
Yes, if you follow safety steps like unplugging the oven and letting it cool. Always wear gloves to protect your hands.
What if the bulb is stuck?
Use a rubber grip or cloth for extra traction. If it’s still stuck, consult a professional to avoid breaking it.
Do all ovens use the same bulb?
No, bulb types vary by model. Check your manual or the old bulb for specifications.
Wrap-Up: Keep Your Oven Bright
Changing an oven light bulb is a quick, budget-friendly way to improve your cooking experience. With the right tools, a compatible bulb, and a focus on safety, you can tackle this task in under 15 minutes. Regular maintenance, like cleaning the cover and using quality bulbs, ensures your oven stays functional and safe. Next time your oven light dims, follow these steps to bring back the glow. Happy cooking!

Hi, I’m Mary, the founder of KitchenClue.com. I’m deeply passionate about everything that makes a kitchen smarter, easier, and more enjoyable. I share hands-on insights and practical expertise on kitchen gear that truly helps in daily cooking. Along with my dedicated research team, we study products carefully, and our writers create honest, well-tested reviews using trusted, authentic sources—so you can choose kitchen tools with total confidence.