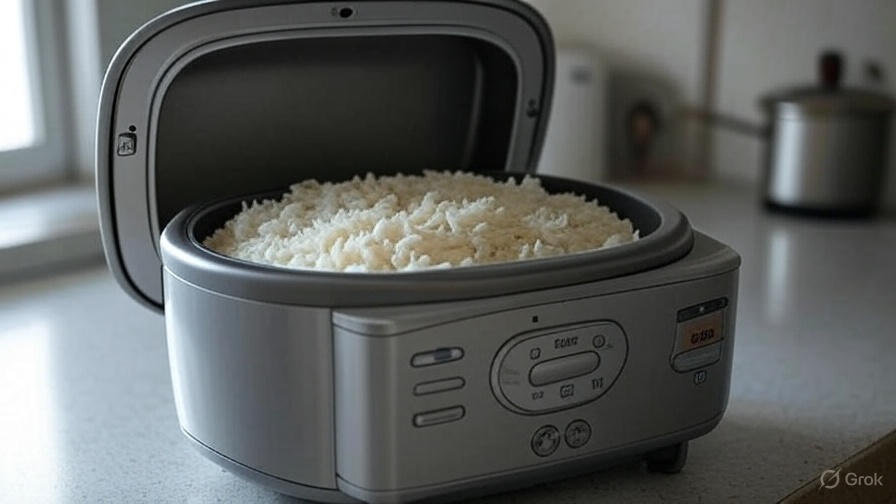
How to Use a Microwavable Rice Cooker?
Cooking perfect rice can feel like an impossible task. You’ve probably experienced sticky, mushy rice or grains that come out hard and undercooked. A microwavable rice cooker solves these problems by taking the guesswork out of rice preparation. This kitchen tool transforms your microwave into a reliable rice-cooking machine that delivers consistent results with minimal effort.
Modern households rely on quick cooking solutions that don’t compromise on quality. Microwavable rice cookers fit perfectly into busy lifestyles while producing restaurant-quality rice in just minutes. These compact devices work with any microwave and cost a fraction of electric rice cookers.
What Makes Microwavable Rice Cookers Special
Microwavable rice cookers use steam circulation to cook rice evenly. The design includes a base container for water and rice, plus a fitted lid with steam vents. This combination creates the ideal cooking environment where steam circulates around the grains without escaping.
The materials matter significantly. Most quality rice steamers use BPA-free plastic or silicone that withstands high microwave temperatures. Heat-resistant construction ensures the cooker won’t warp or crack during repeated use. Many models feature measurement marks inside the container, eliminating the need for separate measuring cups.
Size options range from single-serving containers to family-sized cookers that prepare up to six cups of cooked rice. The compact design means these cookers store easily in kitchen cabinets or drawers when not in use.
Essential Steps for Using Your Rice Cooker
Getting started requires following specific steps that ensure consistent results. These techniques work for all microwavable rice cooker brands and models.
Preparing Your Rice
Start by measuring your desired amount of uncooked rice. One cup of dry rice typically yields three cups of cooked rice, which serves about four people as a side dish. Rinse the rice under cold running water until the water runs clear. This process removes excess starch that causes sticky, clumpy results.
Place the rinsed rice in your microwave rice cooker. The grains should settle evenly across the bottom without piling up in corners. Uneven distribution leads to inconsistent cooking where some grains overcook while others remain hard.
Water Ratios That Work
Water ratios determine whether your rice comes out perfectly fluffy or disappointingly soggy. Different rice varieties require specific water amounts:
Long-grain white rice needs a 1:1.5 ratio (one cup rice to one and a half cups water). This produces separate, fluffy grains that work well for side dishes and fried rice recipes.
Short-grain rice requires a 1:1.25 ratio for sticky results perfect for sushi or rice bowls. The lower water content prevents mushiness while maintaining the characteristic stickiness.
Brown rice demands more water due to its fibrous bran layer. Use a 1:2 ratio and expect longer cooking times. The extra water penetrates the tough outer layer, creating tender grains with a pleasant chewy texture.
Jasmine and basmati rice work best with a 1:1.5 ratio, similar to long-grain varieties. These aromatic rice types benefit from a five-minute rest period before cooking to allow the grains to absorb some water.
Setting Up Your Microwave
Microwave wattage affects cooking times significantly. High-wattage microwaves (1000+ watts) cook rice faster than lower-powered models. Start with recommended times and adjust based on your specific microwave’s performance.
Place your rice cooker in the center of the microwave turntable. This position ensures even heat distribution and prevents hot spots that can burn rice while leaving other areas undercooked. Remove any metal accessories or turntable rings that might interfere with the cooker.
Set your microwave to medium-high power (70-80% power level). Full power often causes water to boil too vigorously, creating uneven cooking and potential overflow. The reduced power setting allows gentle, consistent heating that produces better results.
Mastering Cooking Times and Techniques
Timing plays a crucial role in achieving perfect rice texture. These guidelines provide starting points that you can adjust based on your preferences and microwave specifications.
White Rice Cooking Process
Cook one cup of white rice for 10-12 minutes on medium-high power. The exact time depends on your microwave wattage and desired texture. Start with 10 minutes for slightly firmer rice or 12 minutes for softer grains.
Listen for gentle bubbling sounds during cooking. Vigorous boiling indicates the power level is too high. Reduce power to 60% if you hear aggressive bubbling or see excessive steam escaping from the vents.
After the initial cooking time, let the rice rest for 5 minutes without opening the microwave door. This resting period allows residual steam to finish cooking the grains while preventing condensation from dripping back onto the rice.
Brown Rice Requirements
Brown rice needs 18-20 minutes of cooking time due to its tough bran layer. The extended cooking period allows water to penetrate the fiber-rich exterior and soften the inner starch.
Use 60% power for brown rice to prevent burning while ensuring thorough cooking. Higher power levels often char the bottom layer before the top grains finish cooking. The lower power setting provides gentle, even heat that works through the entire batch.
Rest brown rice for 10 minutes after cooking. This extended resting time allows the grains to absorb any remaining moisture and achieve optimal texture. Opening the cooker too early results in unevenly cooked grains.
Specialty Rice Varieties
Wild rice requires the longest cooking time at 25-30 minutes on 50% power. This hardy grain needs gentle, prolonged heating to become tender without turning mushy. Add an extra quarter cup of water for wild rice to compensate for the extended cooking period.
Arborio rice for risotto cooks in 15-16 minutes with frequent stirring. Stop the microwave every 5 minutes to stir the rice, then continue cooking. This technique releases starch gradually, creating the creamy texture that defines perfect risotto.
Quinoa works well in microwavable rice cookers despite not being true rice. Use a 1:2 ratio of quinoa to water and cook for 12-15 minutes on medium power. The finished quinoa should be fluffy with a slight pop when you bite the grains.
Troubleshooting Common Issues
Even experienced cooks encounter problems when learning to use microwavable rice cookers. These solutions address the most frequent issues and help you achieve consistent results.
Preventing Overflow Problems
Overflow occurs when you use too much water or cook at excessive power levels. The vigorous boiling causes water and starch to foam up and spill over the container edges. This mess is preventable with proper technique.
Reduce your water by two tablespoons if you consistently experience overflow. Some rice varieties release more starch than others, requiring slight water adjustments. Keep notes about which rice types work best with specific water amounts.
Never fill your rice cooker more than two-thirds full. Rice expands significantly during cooking, and overfilling guarantees spillovers. Cook large batches in multiple smaller portions rather than cramming everything into one cooking session.
Fixing Undercooked Rice
Undercooked rice feels hard and crunchy in the center of each grain. This problem usually results from insufficient water or cooking time. The solution involves adding more liquid and continuing the cooking process.
Add two tablespoons of hot water to undercooked rice and stir gently. Return the cooker to the microwave for an additional 2-3 minutes on medium power. Check the texture and repeat if necessary until the rice reaches your desired doneness.
Altitude affects cooking times significantly. High-altitude locations require longer cooking periods and slightly more water. Increase cooking time by 2-3 minutes and add an extra tablespoon of water if you live above 3,000 feet elevation.
Dealing with Mushy Rice
Overcooked rice becomes mushy and loses its individual grain structure. This texture problem typically results from too much water or excessive cooking time. While you can’t completely reverse mushiness, you can improve the texture.
Spread mushy rice on a baking sheet and let it air dry for 10-15 minutes. This technique removes excess moisture and firms up the texture somewhat. The rice won’t return to perfect condition but becomes more palatable.
Use mushy rice for recipes that benefit from softer grains. Rice pudding, soup thickener, or baby food all work well with overcooked rice. Don’t waste the batch – repurpose it for dishes where soft texture is desirable.
Advanced Tips for Perfect Results
Experienced users develop techniques that consistently produce exceptional rice. These advanced methods take your microwavable rice cooker skills to the next level.
Flavor Enhancement Techniques
Toast your rice before adding water for deeper, nuttier flavors. Heat the dry rice in your microwave cooker for 2-3 minutes on high power, stirring every minute. The grains should smell fragrant and appear slightly golden before you add liquid.
Replace some cooking water with broth for richer taste. Chicken, vegetable, or beef broth adds savory depth that plain water cannot provide. Use a 50-50 ratio of broth to water to avoid overwhelming the rice with salt.
Add aromatics during cooking for infused flavors. Bay leaves, cinnamon sticks, or cardamom pods complement rice beautifully. Remove these whole spices before serving to avoid unpleasant surprises for your diners.
Texture Modifications
Create fluffier rice by adding a teaspoon of oil or butter before cooking. The fat coats individual grains and prevents them from sticking together. This technique works especially well for long-grain varieties used in pilafs or side dishes.
Achieve stickier rice by increasing the water slightly and stirring once during cooking. This method releases more starch from the grains, creating the cohesive texture preferred for sushi or rice bowls.
Mix different rice varieties for complex textures and flavors. Combine wild rice with brown rice for earthy, chewy results. Mix jasmine rice with short-grain rice for aromatic, slightly sticky grains perfect for Asian dishes.
Time-Saving Strategies
Prepare multiple portions and freeze cooked rice in individual containers. Frozen cooked rice reheats perfectly in the microwave and saves significant time on busy weeknights. Label containers with the rice variety and cooking date for easy identification.
Cook rice in advance and store it in the refrigerator for up to five days. Cold cooked rice works excellently for fried rice dishes where you actually want drier, firmer grains. The overnight chilling process removes excess moisture naturally.
Batch cook different rice varieties on meal prep days. Having various types ready means you can quickly create diverse meals throughout the week. Store different varieties in separate containers to maintain their distinct characteristics.
Maintenance and Care Instructions
Proper maintenance extends your rice cooker’s lifespan and ensures safe, hygienic cooking. These care practices keep your cooker in optimal condition for years of reliable service.
Daily Cleaning Routine
Wash your rice cooker immediately after each use to prevent starch buildup. Rinse with warm water first to remove loose rice particles, then wash with mild dish soap. Avoid abrasive scrubbers that can scratch the plastic surface and create bacteria-harboring grooves.
Pay special attention to the lid and steam vents. Rice starch can clog these openings and affect steam circulation during cooking. Use a small brush or toothpick to clear any blockages in the vent holes.
Dry all components thoroughly before storing. Trapped moisture can lead to mold growth or unpleasant odors. Air drying works well, or you can use a clean kitchen towel to speed the process.
Deep Cleaning Methods
Perform deep cleaning monthly to remove stubborn starch deposits. Fill the cooker halfway with equal parts water and white vinegar. Microwave this solution for 5 minutes, then let it sit for 15 minutes before scrubbing and rinsing.
Remove persistent odors by cleaning with baking soda paste. Mix three tablespoons of baking soda with enough water to form a thick paste. Scrub the interior surfaces, let sit for 30 minutes, then rinse thoroughly.
Check for wear signs during deep cleaning sessions. Cracks, warping, or persistent stains indicate it’s time to replace your rice cooker. Using damaged cookware can lead to uneven cooking or potential safety hazards.
Storage Best Practices
Store your rice cooker in a dry cabinet away from heat sources. Extreme temperatures can warp plastic components and affect performance. Keep the lid slightly ajar during storage to allow air circulation and prevent trapped odors.
Nest smaller accessories inside the main container to save storage space. This organization method keeps all components together and prevents lost parts. Consider using a storage bag to keep everything contained and dust-free.
Register your rice cooker if it comes with a warranty. Many manufacturers offer replacement parts or discounted replacements for registered products. Keep your receipt and warranty information in an easily accessible location.
Conclusion
Microwavable rice cookers revolutionize home cooking by making perfect rice accessible to everyone. These simple tools eliminate the guesswork and frustration traditionally associated with rice preparation. With proper technique and practice, you’ll consistently produce fluffy, flavorful rice that rivals restaurant quality.
The key to success lies in understanding your specific microwave’s power level and adjusting cooking times accordingly. Start with the recommended ratios and times, then fine-tune based on your equipment and preferences. Keep detailed notes about what works best for your favorite rice varieties.
Remember that patience and practice lead to mastery. Your first few attempts might not be perfect, but each cooking session teaches valuable lessons about timing, water ratios, and technique. Soon, you’ll be creating delicious rice dishes with confidence and ease.
Invest in a quality microwavable rice cooker and discover how this simple tool can transform your meal preparation routine. Perfect rice becomes an everyday reality rather than an occasional stroke of luck. Your family and guests will notice the difference, and you’ll wonder how you ever cooked rice without this handy kitchen companion.

Hi, I’m Mary, the founder of KitchenClue.com. I’m deeply passionate about everything that makes a kitchen smarter, easier, and more enjoyable. I share hands-on insights and practical expertise on kitchen gear that truly helps in daily cooking. Along with my dedicated research team, we study products carefully, and our writers create honest, well-tested reviews using trusted, authentic sources—so you can choose kitchen tools with total confidence.