How Big is a Loaf Pan?
Home bakers often find themselves staring at recipes that call for specific loaf pan sizes, wondering if their pan will work. The truth is, loaf pans come in various sizes, and using the wrong one can dramatically affect your baking results. This comprehensive guide will help you understand everything about loaf pan dimensions, from standard sizes to specialty options.
Standard Loaf Pan Sizes: What Every Baker Should Know
The most common loaf pan size in American kitchens measures 9 x 5 x 3 inches. This standard size holds approximately 8 cups of batter and works perfectly for most bread recipes, pound cakes, and meatloaf dishes. The 9-inch length provides enough space for proper rise, while the 5-inch width creates that classic loaf shape we all recognize.
However, the 8.5 x 4.5 x 2.5-inch loaf pan runs a close second in popularity. This slightly smaller pan holds about 6 cups of batter and creates a more compact loaf. Many vintage recipes were developed using this size, so you might need to adjust newer recipes if you’re using grandmother’s old pan.
Professional bakers often prefer the 10 x 5 x 3-inch pan for commercial applications. This larger size accommodates bigger batches and creates impressive loaves for special occasions. The extra inch in length allows for more generous portions without compromising the loaf’s structural integrity.
Mini Loaf Pans: Perfect for Portion Control
Mini loaf pans have gained tremendous popularity among home bakers who want individual servings or gift-sized portions. These smaller pans typically measure 5.75 x 3.25 x 2 inches and hold about 2 cups of batter. A standard recipe that fills one 9 x 5-inch pan will usually make four to six mini loaves, depending on how full you fill each pan.
The beauty of mini loaf pans lies in their versatility. You can experiment with different flavors in one batch, create portion-controlled servings for dietary goals, or make perfect gifts for neighbors and friends. The smaller size also means faster baking times, typically reducing cooking time by 15-20 minutes compared to full-size loaves.
Restaurant supply stores often carry mini loaf pans in sets of six or twelve, making them ideal for entertaining or holiday baking. The individual portions eliminate the need for slicing, and guests can take home leftover mini loaves without awkward cutting and wrapping.
Specialty Loaf Pan Sizes for Unique Needs
Beyond standard sizes, specialty loaf pans serve specific purposes in the kitchen. The pullman loaf pan, measuring 13 x 4 x 4 inches, creates perfectly square sandwich bread slices. This pan comes with a sliding lid that prevents the traditional dome shape, resulting in uniform slices ideal for sandwiches and toast.
Round loaf pans, typically 8 or 9 inches in diameter, offer an alternative shape for artisan breads and coffee cakes. These pans work particularly well for recipes that benefit from even heat distribution, such as dense fruit breads or layered coffee cakes.
Long, narrow loaf pans measuring 12 x 3 x 3 inches are perfect for French bread, baguettes, or thin pound cakes. These pans create elegant, professional-looking loaves that slice beautifully for appetizers or dessert presentations.
Material Matters: How Pan Construction Affects Size
The material of your loaf pan can slightly affect its internal dimensions and, consequently, your baking results. Aluminum pans conduct heat efficiently and often have thinner walls, maximizing internal space. A 9 x 5-inch aluminum pan might hold slightly more batter than the same size in ceramic or glass.
Glass loaf pans typically have thicker walls, which can reduce internal capacity by a few tablespoons. However, glass distributes heat more evenly, often resulting in better-textured loaves. When using glass pans, you might need to reduce oven temperature by 25 degrees to prevent over-browning.
Silicone loaf pans offer flexibility in removal but can have slightly different dimensions than rigid pans. The flexible material might expand slightly when filled with batter, potentially affecting the final loaf shape. Always check the manufacturer’s specifications for exact measurements.
Non-stick coated pans usually maintain standard dimensions while offering easy release. However, the coating can wear over time, potentially affecting both the pan’s performance and its effective size as scratches and wear create uneven surfaces.
International Loaf Pan Sizes: Global Variations
European loaf pans often follow different sizing conventions than American ones. A standard European loaf pan might measure 23 x 13 x 7 centimeters, roughly equivalent to 9 x 5 x 2.75 inches. These slight variations can affect recipe outcomes, so always check measurements when using international recipes.
British loaf tins commonly measure 2 pounds (900g) or 1 pound (450g) in capacity rather than by dimensions. A 2-pound loaf tin roughly equals a 9 x 5 x 3-inch American pan, while a 1-pound tin approximates an 8.5 x 4.5 x 2.5-inch pan.
Asian markets often carry loaf pans designed for specific breads like Japanese shokupan or Chinese steamed breads. These pans might have unique proportions that create particular textures and shapes traditional to those baking styles.
Measuring Your Loaf Pan: A Step-by-Step Guide
To accurately measure your loaf pan, start by measuring the internal dimensions from rim to rim. Use a ruler or measuring tape to determine length, width, and depth. Measure only the interior space where batter will sit, not the external dimensions including the rim.
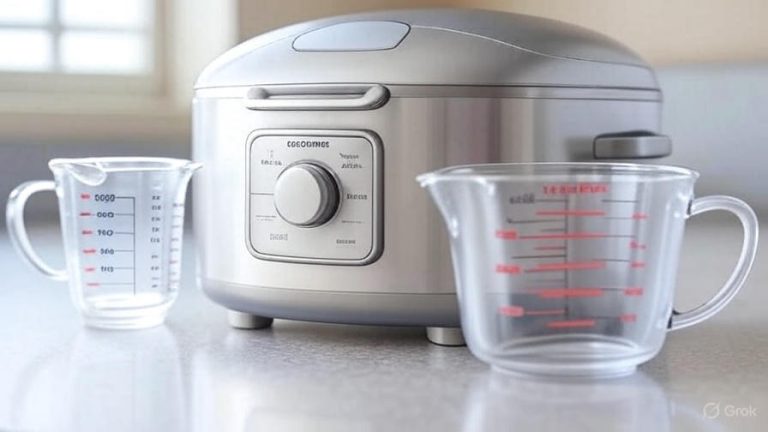
For volume measurement, fill your pan with water using a measuring cup. Count the cups needed to fill the pan to the brim. This method gives you the exact capacity, which is crucial for recipe scaling and substitutions.
Write down your measurements on a piece of tape and stick it to the bottom of the pan. This simple step saves time and confusion when you’re in the middle of baking and need to remember which pan is which.
Keep a kitchen notebook with all your pan measurements listed. Include brand names, materials, and any special characteristics like non-stick coating or unusual shapes. This reference becomes invaluable when trying new recipes or replacing worn pans.
Recipe Scaling: Adjusting for Different Pan Sizes
When your recipe calls for a 9 x 5-inch pan but you only have an 8.5 x 4.5-inch pan, you’ll need to scale down the recipe. The smaller pan holds about 25% less batter, so reduce all ingredients by one-quarter. This adjustment prevents overflow and ensures proper cooking times.
Conversely, if you’re using a larger pan than specified, you might need to increase the recipe or accept a shorter loaf. A 10 x 5-inch pan holds about 15% more batter than a 9 x 5-inch pan, so you can safely increase ingredients by that proportion.
For mini loaf pans, divide your standard recipe by four to six, depending on how full you like your pans. Most bakers fill mini pans about two-thirds full to allow for proper rise without overflow.
Temperature adjustments often accompany size changes. Smaller pans generally require 25-50 degrees lower temperature and shorter baking times. Larger pans might need slightly higher temperatures and longer baking times to ensure the center cooks through.
Common Loaf Pan Problems and Solutions
Overflow issues plague many bakers who misjudge their pan capacity. Always fill loaf pans no more than two-thirds full to allow for proper rise. If your batter seems too much for your pan, divide it between two smaller pans rather than risk overflow.
Uneven baking often results from using the wrong pan size for your recipe. Dense batters in too-large pans spread thin and overbake, while thick batters in too-small pans stay raw in the center. Match your pan size to your recipe’s requirements for best results.
Sticking problems can occur regardless of pan size, but they’re more noticeable in larger pans where more surface area contacts the batter. Proper greasing and flouring, or using parchment paper, prevents sticking issues across all pan sizes.
Shape distortion happens when pans are too large for the batter amount. The batter spreads too thin, creating flat, wide loaves instead of the desired tall, narrow shape. Use appropriately sized pans to maintain proper loaf proportions.
Buying Guide: Choosing the Right Loaf Pan Size
Start with a standard 9 x 5 x 3-inch pan if you’re building your collection. This size works for most recipes and provides the best versatility for everyday baking. Look for heavy-gauge aluminum or quality non-stick coating for durability.
Add an 8.5 x 4.5 x 2.5-inch pan as your second purchase. This size handles vintage recipes and creates more compact loaves perfect for smaller households. Having both sizes covers nearly all standard bread and cake recipes.
Consider mini loaf pans for your third addition. A set of six mini pans opens up possibilities for portion control, gift-giving, and flavor experimentation. Choose dishwasher-safe options for easy cleanup.
Specialty pans like pullman loaf pans or round shapes should come after you’ve mastered standard sizes. These pans serve specific purposes and might not get regular use in average home kitchens.
Maintenance and Storage of Different Sized Pans
Proper storage becomes more complex as your loaf pan collection grows. Stack similar-sized pans together with paper towels or cloth between them to prevent scratching. Store mini pans in a dedicated drawer or box to keep sets together.
Clean different sized pans according to their materials. Aluminum pans can handle aggressive scrubbing, while non-stick surfaces need gentle care. Glass pans can go in the dishwasher, but hand washing preserves their appearance longer.
Seasoning applies mainly to uncoated aluminum and cast iron loaf pans. Rub a thin layer of oil on the surface after cleaning and heat briefly in the oven. This process maintains the pan’s non-stick properties and prevents rust.
Replace pans when they show significant wear, warping, or coating damage. A warped pan distributes heat unevenly, affecting your baking results. Damaged non-stick coating can flake into food and should be discarded immediately.
Professional Tips for Loaf Pan Success
Professional bakers measure ingredients by weight rather than volume, which becomes even more important when scaling recipes for different pan sizes. A kitchen scale eliminates guesswork and ensures consistent results across various pan sizes.
Temperature probes inserted into the center of loaves provide accurate doneness readings regardless of pan size. Bread is done when the internal temperature reaches 190-200°F, while quick breads and cakes finish at 200-210°F.
Rotation during baking ensures even cooking, especially important with larger pans. Turn pans 180 degrees halfway through baking time to compensate for oven hot spots and achieve uniform browning.
Cool loaves properly by removing them from pans within 10 minutes of baking completion. This prevents soggy bottoms and allows proper air circulation. Use wire racks sized appropriately for your loaf dimensions.
Conclusion: Finding Your Perfect Loaf Pan Size
The size of your loaf pan significantly impacts your baking success. Standard 9 x 5 x 3-inch pans work for most recipes, while 8.5 x 4.5 x 2.5-inch pans suit vintage recipes and smaller households. Mini loaf pans offer portion control and gift-giving opportunities, while specialty sizes serve specific baking needs.
Remember that pan material affects capacity and baking performance. Measure your pans accurately and keep records for future reference. Scale recipes appropriately when using different sized pans, and adjust temperatures and timing accordingly.
Start with one or two standard sizes and expand your collection based on your baking preferences. With proper care and storage, quality loaf pans will serve you well for years of successful baking. The key lies in understanding how pan size affects your recipes and adjusting accordingly for consistently excellent results.