How to Clean a Cast Iron Grill?
Cast iron grills deliver unmatched heat retention and create those perfect sear marks that make your barbecue stand out. However, these powerhouse cooking tools require specific care to maintain their performance and prevent rust. Many grill enthusiasts struggle with proper cast iron maintenance, often leading to deteriorated cooking surfaces and shortened equipment lifespan.
This comprehensive guide walks you through every step of cleaning your cast iron grill, from basic maintenance to deep cleaning techniques. You’ll learn professional methods that keep your grill performing at peak levels while extending its life for years of exceptional outdoor cooking.
Why Cast Iron Grills Need Special Care
Cast iron grills differ significantly from stainless steel or porcelain-coated alternatives. The porous nature of cast iron makes it susceptible to rust and corrosion when exposed to moisture. Unlike other materials, cast iron develops a protective seasoning layer that improves with proper care.
The seasoning layer acts as a natural non-stick surface that prevents food from sticking while creating those coveted grill marks. This protective coating requires regular maintenance through proper cleaning and occasional re-seasoning. Neglecting these steps results in rust formation, food sticking, and eventually, complete grill replacement.
Heat distribution represents another key advantage of cast iron grates. The material retains heat evenly across the entire surface, eliminating hot spots that plague other grill types. This consistent temperature control allows for precise cooking, but only when the grates remain properly maintained.
Essential Tools for Cast Iron Grill Cleaning
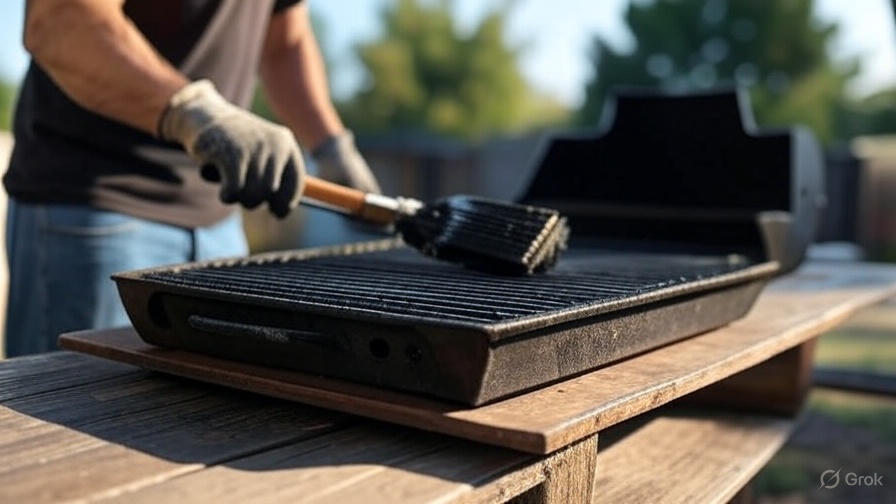
Before starting the cleaning process, gather the right tools to ensure effective and safe maintenance. A stiff wire brush or grill brush removes stuck-on food particles and grease buildup. Choose brushes with brass or stainless steel bristles for optimal cleaning power without damaging the cast iron surface.
Paper towels or clean cloths help remove debris and apply seasoning oil. Avoid using fabric softener-treated towels, as residual chemicals can interfere with the seasoning process. Keep separate towels designated specifically for grill maintenance to prevent cross-contamination with household cleaning products.
High-heat cooking oil plays a crucial role in maintaining the protective seasoning layer. Vegetable oil, canola oil, or specialized cast iron seasoning oils work well. Avoid olive oil, as its low smoke point makes it unsuitable for high-heat seasoning applications.
A plastic scraper removes stubborn food residue without scratching the cast iron surface. Metal scrapers can damage the seasoning layer, requiring additional restoration work. Keep the scraper dedicated to grill use to maintain food safety standards.
Pre-Cleaning Preparation Steps
Start the cleaning process while the grill remains warm but not hot. Warm cast iron cleans more easily as food particles haven’t had time to harden completely. This timing also prevents thermal shock that can occur when applying cold water to extremely hot metal.
Remove the cooking grates from the grill for thorough cleaning access. Most cast iron grates lift out easily, but check your grill’s manual for specific removal instructions. Work over newspaper or a drop cloth to catch falling debris and protect your patio or deck surface.
Inspect the grates for rust spots, excessive buildup, or damaged areas before cleaning. Document any problem areas that may require special attention or replacement. Early identification of issues prevents minor problems from becoming major restoration projects.
Turn off the gas supply and ensure all controls are in the closed position. Allow the grill to cool to a comfortable working temperature while remaining warm enough for effective cleaning. This typically takes 15-20 minutes after cooking.
Basic Daily Cleaning Routine
Daily cleaning after each use prevents buildup that requires intensive scrubbing later. Start by scraping off food particles with your plastic scraper while the grates remain warm. Work systematically across each grate to remove all visible debris.
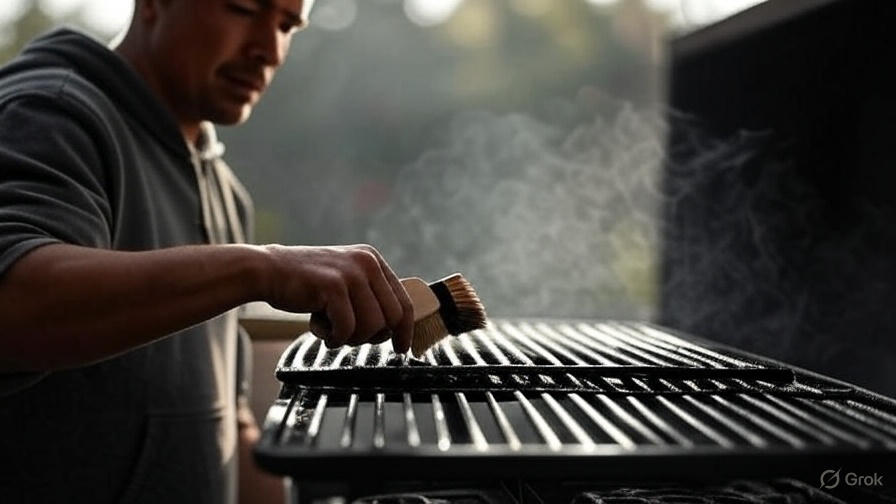
Use the wire brush to scrub the grate surfaces thoroughly. Apply firm pressure and work in long strokes parallel to the grate bars. This technique removes embedded food particles while preserving the seasoning layer. Brush both sides of each grate for complete cleaning.
Wipe down the grates with a damp paper towel to remove loosened debris. The towel should be damp, not soaking wet, to avoid introducing excessive moisture to the cast iron. Ring out excess water before wiping to prevent rust formation.
Apply a thin layer of high-heat cooking oil to all grate surfaces while they remain slightly warm. This step maintains the protective seasoning layer and prevents rust between uses. Use a paper towel to distribute the oil evenly, ensuring complete coverage without pooling.
Deep Cleaning Methods for Heavy Buildup
When basic cleaning isn’t sufficient, deep cleaning removes stubborn grease and carbon buildup. This process requires more time and effort but restores grates to like-new condition. Plan for 2-3 hours depending on the level of buildup and number of grates.
Create a cleaning solution using warm water and a small amount of mild dish soap. Avoid harsh detergents or chemicals that can strip the seasoning layer. The solution should be sudsy but not overly concentrated to prevent residue that interferes with seasoning.
Soak the grates in the cleaning solution for 30-45 minutes to soften built-up grease and food particles. Use a large basin or bathtub that accommodates the grate size. Ensure complete submersion for even cleaning action across all surfaces.
Scrub the soaked grates with the wire brush, focusing on problem areas with heavy buildup. The soaking process makes scrubbing more effective while requiring less physical effort. Work systematically to ensure no areas are missed during the cleaning process.
Rinse the grates thoroughly with clean water to remove all soap residue. Soap left on cast iron can create off-flavors and interfere with the seasoning process. Multiple rinses may be necessary to eliminate all traces of cleaning solution.
Removing Rust from Cast Iron Grates
Rust formation requires immediate attention to prevent spreading and permanent damage. Light surface rust can be removed with standard cleaning methods, while heavy rust requires more aggressive treatment. Assess the rust level before choosing your removal approach.
For light rust, use fine steel wool or a wire brush to gently remove the oxidized areas. Work in circular motions with moderate pressure to avoid removing too much base metal. Focus on rusty spots rather than scrubbing the entire surface unnecessarily.
Heavy rust may require commercial rust removers designed for cast iron. Follow manufacturer instructions carefully and ensure adequate ventilation during application. These products contain strong chemicals that require proper safety precautions including gloves and eye protection.
After rust removal, wash the grates thoroughly with soap and water to remove all chemical residues. Dry completely with towels, then heat the grates on the grill to eliminate any remaining moisture. This preparation step is essential before re-seasoning the cleaned surfaces.
Proper Drying Techniques
Thorough drying prevents rust formation and prepares grates for seasoning. Air drying alone is insufficient for cast iron, as residual moisture trapped in the porous material leads to oxidation. Active drying methods ensure complete moisture removal.
After washing, towel dry the grates immediately to remove surface water. Use clean, lint-free towels that won’t leave fibers on the cast iron surface. Pay special attention to crevices and joints where water tends to collect.
Place the dried grates back on the grill and heat them on medium-high temperature for 10-15 minutes. This process evaporates any remaining moisture trapped in the metal pores. The grates should appear completely dry with no visible steam or condensation.
Allow the heated grates to cool slightly before applying seasoning oil. They should remain warm to the touch for optimal oil absorption. This temperature helps the oil penetrate the metal pores for better seasoning adhesion.
Seasoning Your Cast Iron Grill Grates
Seasoning creates the protective layer that prevents rust and provides non-stick properties. This process involves applying oil and heating it to create a polymerized coating that bonds to the metal surface. Proper seasoning transforms raw cast iron into a superior cooking surface.
Apply a thin, even layer of high-heat oil to all grate surfaces using a paper towel. Cover every surface including the undersides and edges. The oil layer should be visible but not pooling or dripping off the grates.
Heat the oiled grates on high temperature for 15-20 minutes until the oil begins to smoke. This smoking indicates the polymerization process has begun. The oil will gradually stop smoking as it converts to the protective seasoning layer.
Turn off the heat and allow the grates to cool on the grill. Don’t move or handle them during cooling to avoid disturbing the newly formed seasoning. The grates will develop a darker, more uniform appearance as the seasoning cures.
Repeat the seasoning process 2-3 times for new or heavily cleaned grates. Each layer builds upon the previous one to create a durable, long-lasting protective coating. Well-seasoned grates develop a smooth, almost glossy appearance.
Storage Tips for Cast Iron Grates
Proper storage prevents rust and maintains seasoning between grilling seasons. Cast iron requires dry conditions and protection from moisture to remain in optimal condition. Storage preparation is especially important in humid climates or during winter months.
Clean and season the grates thoroughly before storage using the methods outlined above. Ensure they are completely dry and properly oiled to prevent rust formation during extended periods of non-use. This preparation step is crucial for long-term storage success.
Store grates in a dry location with good air circulation. Avoid damp basements, garages, or outdoor storage areas where moisture can accumulate. A dry pantry, closet, or heated garage provides ideal storage conditions for cast iron equipment.
Wrap individual grates in paper or cloth to prevent scratching during storage. Avoid plastic wraps that can trap moisture and promote rust formation. The wrapping material should allow air circulation while protecting the seasoned surfaces.
Check stored grates monthly for signs of rust or deterioration. Early detection allows for quick treatment before problems become severe. Light surface rust can be addressed immediately rather than requiring complete restoration.
Common Mistakes to Avoid
Using soap regularly on well-seasoned grates strips the protective coating and requires re-seasoning. Reserve soap use for heavy cleaning situations or rust removal only. Water and scrubbing handle most routine cleaning needs without damaging the seasoning layer.
Soaking cast iron grates for extended periods promotes rust formation and seasoning loss. Limit soaking to 30-45 minutes maximum and only when necessary for deep cleaning. Longer exposure to water causes more damage than benefit.
Applying too much oil during seasoning creates a sticky, gummy surface that attracts dirt and debris. Thin, even coats produce better results than heavy applications. Excess oil should be wiped away before heating to prevent buildup.
Storing damp or improperly dried grates guarantees rust problems. Always ensure complete drying and proper seasoning before storage. This extra time investment prevents extensive restoration work later.
Using the wrong cleaning tools can damage cast iron surfaces and remove seasoning. Stick to appropriate brushes, scrapers, and cloths designed for cast iron maintenance. Avoid abrasive pads or harsh chemicals that strip protective coatings.
Professional Maintenance Schedule
Weekly deep cleaning during active grilling season keeps grates in peak condition. This schedule prevents heavy buildup while maintaining seasoning integrity. Adjust frequency based on usage patterns and cooking styles that create more or less residue.
Monthly inspection for rust spots or seasoning wear allows early intervention before problems worsen. Document any changes in grate condition to track maintenance needs. This monitoring helps predict when replacement becomes necessary.
Seasonal preparation and storage procedures ensure grates survive non-use periods without deterioration. Fall preparation prevents winter damage, while spring restoration prepares equipment for the new grilling season. These seasonal routines extend grate lifespan significantly.
Annual assessment of overall grate condition helps plan replacement or restoration projects. Even well-maintained cast iron eventually shows wear and may benefit from professional reconditioning. Planning ahead prevents mid-season equipment failures.
Troubleshooting Common Problems
Food sticking to supposedly seasoned grates indicates insufficient or damaged seasoning. Re-season the affected areas using the complete process outlined above. Multiple seasoning coats may be necessary to restore non-stick properties fully.
Uneven heating patterns suggest warped or damaged grates that may require replacement. Check for cracks, severe rust, or structural damage that affects performance. Minor issues can be addressed, but major damage typically requires new grates.
Off-flavors in grilled food point to inadequate cleaning or contaminated seasoning. Strip the grates completely and start fresh with thorough cleaning and re-seasoning. This process eliminates accumulated residues that affect food taste.
Persistent rust formation despite proper care indicates storage or environmental issues. Evaluate storage conditions and consider climate control measures for high-humidity areas. Sometimes, location changes solve recurring rust problems.
Cost-Effective Maintenance Solutions
Regular maintenance costs far less than grate replacement and delivers better cooking performance. Invest in quality cleaning tools and proper storage solutions to maximize grate lifespan. The upfront cost pays for itself through extended equipment life.
Generic cooking oils work as well as expensive specialty products for seasoning purposes. Focus on high smoke point rather than brand name when selecting oils. Bulk purchasing reduces per-application costs for frequent grill users.
DIY cleaning solutions using household items often outperform commercial products. Simple soap and water handle most cleaning needs without premium product costs. Reserve specialty products for problem situations that require extra cleaning power.
Preventive maintenance prevents costly restoration projects and extends grate replacement cycles. Time invested in proper care saves money and improves cooking results. This approach makes cast iron grills more economical over their service life.
Conclusion
Cleaning and maintaining cast iron grill grates requires dedication but rewards you with superior cooking performance and extended equipment life. The process becomes routine with practice, taking less time while delivering better results. Proper care transforms your grill into a reliable cooking partner that improves with age.
Start implementing these cleaning techniques after your next grilling session. Consistent application of these methods will keep your cast iron grates performing at their best while preventing common problems like rust and food sticking. Your investment in proper maintenance will pay dividends in better-tasting food and years of reliable grilling performance.
Remember that cast iron grates improve with use and proper care. Each cooking session and cleaning cycle builds upon previous maintenance to create an exceptional cooking surface. The effort you invest today ensures countless successful grilling experiences in the future.