
How to Grind Meat with a Meat Grinder?
Fresh ground meat transforms ordinary meals into extraordinary culinary experiences. When you grind your own meat at home, you control every aspect of the process – from the cut selection to the final texture. This comprehensive guide walks you through everything you need to know about grinding meat with a meat grinder, ensuring perfect results every time.
Why Grind Your Own Meat at Home?
Store-bought ground meat often contains mystery ingredients and additives you can’t control. Home grinding gives you complete transparency about what goes into your food. You decide which cuts to use, how much fat to include, and when to grind the meat for maximum freshness.
Fresh ground meat also tastes significantly better than pre-packaged alternatives. The flavor remains vibrant and rich because you’re grinding it right before cooking. Commercial ground meat can sit on shelves for days, losing both taste and nutritional value.
Cost savings add another compelling reason to grind meat yourself. Buying whole cuts and grinding them at home typically costs less per pound than purchasing pre-ground meat. You can also take advantage of sales on larger cuts and grind portions as needed.
Essential Equipment for Meat Grinding
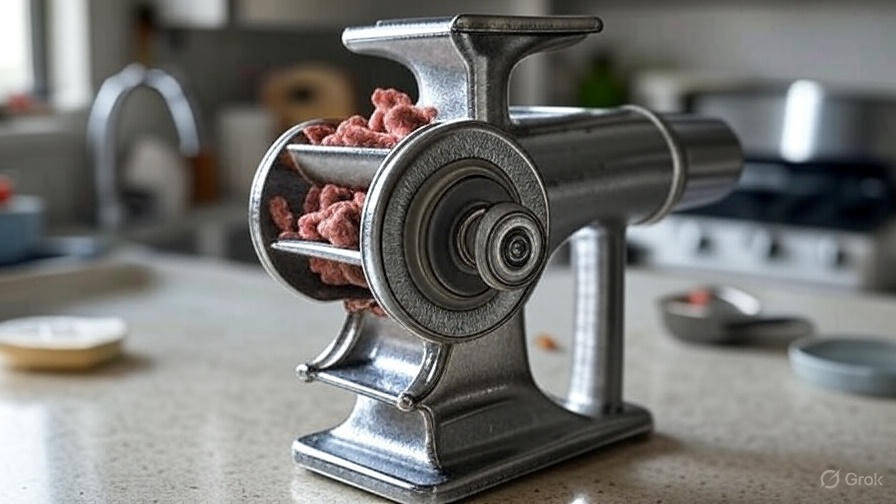
Types of Meat Grinders
Electric meat grinders handle large volumes efficiently and require minimal physical effort. These powerful machines work best for regular meat grinding or when processing several pounds at once. Most electric models come with multiple grinding plates for different textures.
Manual meat grinders require more effort but offer better control over the grinding process. Hand-crank models work perfectly for smaller batches and don’t need electricity. They’re also quieter and easier to clean than electric versions.
Stand mixer attachments provide a middle ground between manual and dedicated electric grinders. If you already own a stand mixer, the grinding attachment costs less than a separate machine. However, these attachments typically process meat more slowly than dedicated grinders.
Grinding Plates and Blades
Coarse grinding plates create chunky textures perfect for chili, meatballs, and rustic sausages. These plates typically have holes ranging from 6mm to 10mm in diameter. The larger holes preserve more of the meat’s original texture.
Medium grinding plates work well for burgers, meatloaf, and general cooking applications. With holes around 4.5mm to 6mm, they create the familiar texture most people expect from ground meat.
Fine grinding plates produce smooth, uniform textures ideal for pâtés, hot dogs, and emulsified sausages. These plates have holes smaller than 4.5mm and create almost paste-like consistency when used properly.
Sharp blades make all the difference in grinding quality. Dull blades smash and tear meat fibers instead of cutting them cleanly. This creates mushy textures and can make the meat tough when cooked.
Selecting the Right Meat for Grinding
Best Cuts for Ground Meat
Chuck roast provides the ideal balance of flavor and fat content for most ground beef applications. This cut contains approximately 20% fat, which keeps burgers and meatballs moist without being greasy. The rich, beefy flavor makes chuck the gold standard for ground meat.
Short ribs add incredible flavor to ground meat blends but contain more fat than chuck. Mix short ribs with leaner cuts like sirloin to create custom fat ratios. The marbling in short ribs contributes to exceptional taste in finished dishes.
Sirloin offers lean protein with good flavor for those wanting less fat in their ground meat. While sirloin alone can produce dry results, it blends well with fattier cuts to create balanced mixtures.
Pork shoulder works excellently for ground pork with its ideal fat-to-meat ratio. This cut grinds easily and produces moist, flavorful results perfect for Italian sausages, meatballs, and Asian dishes.
Lamb shoulder creates delicious ground lamb with authentic Middle Eastern and Mediterranean flavors. The natural fat content keeps the meat tender while the distinctive lamb taste shines through.
Fat Content Considerations
Proper fat ratios determine the final quality of your ground meat. Too little fat results in dry, crumbly textures that lack flavor. Too much fat creates greasy, dense results that can be unappetizing.
For burgers, aim for 20-25% fat content to ensure juicy, flavorful patties that hold together well. This ratio provides enough fat to keep the meat moist during cooking while preventing excessive shrinkage.
Meatballs and meatloaf work best with 15-20% fat content. The slightly lower fat percentage helps these dishes hold their shape better while still maintaining moisture and flavor.
Lean applications like tacos or pasta sauces can use 10-15% fat content. The other ingredients in these dishes provide moisture and flavor, so less fat in the meat works well.
Preparing Meat for Grinding
Proper Meat Temperature
Cold meat grinds more effectively than room temperature meat. The cold temperature helps maintain the fat’s structure, preventing it from smearing and creating undesirable textures. Aim for meat temperature between 28-32°F for optimal grinding conditions.
Place your meat cuts in the freezer for 30-60 minutes before grinding, depending on thickness. The meat should feel firm but not frozen solid. You want it cold enough to grind cleanly without being so frozen that it damages your grinder.
Test the temperature by pressing the meat with your finger. Properly chilled meat will feel very cold and firm but still yield slightly to pressure. If it feels rock-hard, let it thaw for a few minutes before grinding.
Cutting Meat into Proper Sizes
Cut your meat into strips or cubes that fit easily into your grinder’s feed tube. Most grinders work best with pieces roughly 1-2 inches wide. Larger pieces can jam the machine, while smaller pieces may not feed properly.
Remove any silver skin, excessive connective tissue, or gristle before cutting. These tough materials can wrap around the grinder blade and cause jams. Sharp kitchen shears work well for trimming difficult areas.
Keep fat pieces roughly the same size as meat pieces for even distribution in the final grind. This ensures consistent fat content throughout the ground meat rather than having some areas with too much or too little fat.
Step-by-Step Grinding Process
Setting Up Your Grinder
Assemble your grinder according to the manufacturer’s instructions, ensuring all parts fit snugly together. Loose components can cause poor grinding results or even safety hazards during operation.
Chill all grinder parts in the freezer for 30 minutes before use. Cold metal helps maintain proper meat temperature during grinding and prevents fat from smearing. This step is especially important for achieving clean, professional results.
Attach the appropriate grinding plate for your desired texture. Start with a coarse plate if you plan to grind the meat twice for finer results. Single-pass grinding through a fine plate often produces better texture than multiple passes through coarse plates.
The Grinding Technique
Feed meat pieces into the grinder at a steady, consistent pace. Don’t force large amounts through at once, as this can overwhelm the machine and produce poor results. Let the grinder do the work while you maintain steady feeding pressure.
Use the pusher tool provided with your grinder rather than your fingers to guide meat into the feed tube. This keeps your hands safe while ensuring consistent feeding. Never use anything other than the designated pusher tool.
Watch the meat as it comes out of the grinder. Properly ground meat should have clean, distinct pieces rather than a smeared or mushy appearance. If you notice smearing, stop grinding and check that your blade is sharp and everything is properly chilled.
Managing the Output
Place a large bowl or tray under the grinder output to catch the ground meat. Position it close enough to prevent meat from falling but not so close that it interferes with the grinding process.
Work in batches if grinding large quantities of meat. This prevents the grinder motor from overheating and maintains consistent results throughout the process. Most home grinders work best with 2-3 pound batches at a time.
Mix different cuts together as they come out of the grinder for even distribution. Don’t wait until all meat is ground to combine different types, as this can lead to uneven mixing and inconsistent fat distribution.
Achieving Different Textures
Coarse Ground Meat
Coarse ground meat retains more of the original meat’s texture and bite. Use the largest grinding plate available for your machine, typically 8-10mm holes. This texture works perfectly for chili, rustic meatballs, and hearty pasta sauces.
Keep the meat extra cold when grinding for coarse textures. The firmer meat structure helps maintain larger pieces and prevents breaking down into smaller fragments during the grinding process.
Handle coarse ground meat gently after grinding to preserve the larger pieces. Excessive mixing or handling can break down the texture you’ve worked to achieve.
Medium Ground Meat
Medium ground meat provides the familiar texture most people expect from store-bought ground meat. Use a 4.5-6mm grinding plate for this standard texture that works well in burgers, meatloaf, and general cooking applications.
This texture requires less precise temperature control than coarse grinding but still benefits from properly chilled meat. The medium plate size provides good balance between texture and ease of grinding.
Medium ground meat handles well for shaping into patties, meatballs, or other formed dishes. The particle size provides good binding while maintaining some texture interest.
Fine Ground Meat
Fine ground meat creates smooth, uniform textures perfect for sausages, pâtés, and emulsified products. Use the smallest grinding plate available, typically 3-4mm holes, and ensure everything stays very cold throughout the process.
Consider grinding the meat twice for extra-fine textures. First pass through a medium plate, then through the fine plate for the smoothest possible result. This two-stage process often produces better texture than forcing everything through the fine plate at once.
Fine ground meat requires careful handling to prevent overworking. The small particle size makes it more susceptible to becoming dense or tough if mixed too aggressively.
Safety and Hygiene Best Practices
Sanitation Procedures
Clean and sanitize all grinder parts before use with hot, soapy water followed by a sanitizing solution. Pay special attention to the blade, plates, and any areas where meat will make contact during grinding.
Keep raw meat separate from other ingredients and clean surfaces until ready to grind. Use separate cutting boards and utensils for raw meat to prevent cross-contamination with other foods.
Wash your hands thoroughly before and after handling raw meat. Change gloves if using them, especially when switching between different types of meat or when touching other surfaces.
Temperature Safety
Maintain proper cold chain temperature throughout the grinding process. Never let meat sit at room temperature for extended periods, as this creates ideal conditions for bacterial growth.
Grind meat immediately after removing it from refrigeration when possible. If you must prepare meat in advance, keep it in the refrigerator until the moment you’re ready to grind.
Use ground meat within 24 hours of grinding for best quality and safety. Fresh ground meat has more surface area exposed to air, making it more perishable than whole cuts.
Equipment Safety
Ensure your grinder is properly assembled and stable before operation. A wobbly or improperly assembled grinder can cause injury or produce poor results.
Never put your fingers near the grinding mechanism while the machine is running. Always use the provided pusher tool and keep hands well clear of moving parts.
Stop the grinder immediately if you hear unusual noises or notice any binding. Continuing to operate a malfunctioning grinder can damage the equipment or create safety hazards.
Troubleshooting Common Problems
Smearing and Mushy Texture
Smearing occurs when fat gets warm and spreads instead of cutting cleanly. This creates an unappetizing, paste-like texture that affects both appearance and taste. The solution involves better temperature control and equipment maintenance.
Check that your meat and grinder parts are properly chilled before grinding. Warm meat or equipment causes fat to smear rather than cut cleanly. Return everything to the freezer for additional chilling if needed.
Examine your grinder blade for sharpness. Dull blades tear and smash meat instead of cutting it cleanly, leading to smeared textures. Replace or sharpen the blade if it shows signs of wear.
Jamming and Clogging
Meat jams often result from feeding too much meat too quickly into the grinder. The machine becomes overwhelmed and can’t process the volume effectively, causing blockages in the grinding mechanism.
Reduce the feeding rate and work in smaller batches to prevent overwhelming the grinder. Let the machine catch up between additions rather than continuously feeding meat into the tube.
Remove any tough connective tissue, silver skin, or gristle that might wrap around the blade and cause jams. These materials don’t grind well and can bind up the mechanism.
Uneven Fat Distribution
Uneven fat distribution creates some areas of ground meat that are too lean while others are too fatty. This inconsistency affects both cooking properties and final taste of dishes made with the meat.
Cut fat and lean meat pieces to similar sizes before grinding to promote even distribution. Large fat chunks tend to stay together rather than mixing uniformly with the lean meat.
Mix different cuts together as they come out of the grinder rather than grinding each cut separately. This promotes better integration of different fat levels throughout the batch.
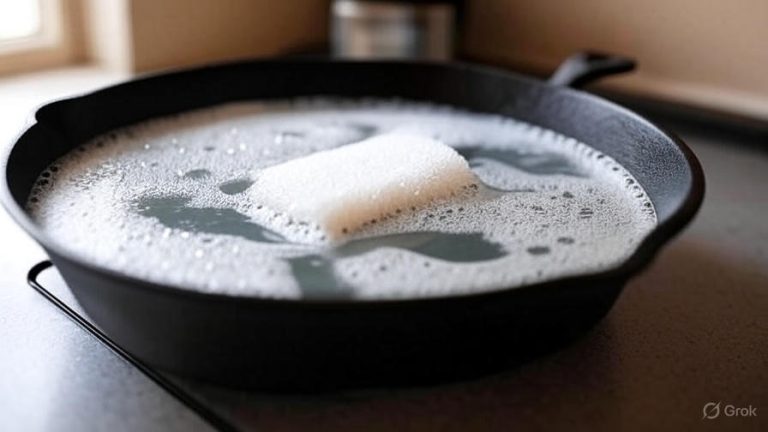
Cleaning and Maintenance
Post-Grinding Cleanup
Disassemble your grinder completely after each use for thorough cleaning. Remove all parts that come into contact with meat, including plates, blades, and feed tubes. This ensures no meat residue remains to harbor bacteria.
Rinse all parts with cold water first to remove meat particles, then wash with hot, soapy water. Cold water prevents proteins from cooking onto the metal surfaces, making them easier to clean.
Use a brush to clean hard-to-reach areas like the holes in grinding plates. Small brushes or pipe cleaners work well for removing meat particles from these tight spaces.
Long-term Maintenance
Dry all parts thoroughly after cleaning to prevent rust and corrosion. Pay special attention to areas where water might collect, such as the threading on plates or around the blade assembly.
Apply a light coating of food-grade oil to metal parts before storage to protect against moisture and rust. This is especially important for cast iron or carbon steel components.
Store grinding plates and blades in a dry location where they won’t get damaged. Consider using blade guards or storing them in protective containers to maintain sharp edges.
Blade Sharpening and Replacement
Sharp blades are essential for clean, efficient grinding. Dull blades produce poor textures and can strain the grinder motor. Learn to recognize when your blade needs attention.
Professional sharpening services can restore blade edges when they become dull. Many knife sharpening services also handle grinder blades, or you can find specialized services that focus on meat processing equipment.
Replace blades when they become too worn for effective sharpening. Severely worn blades may have chips, cracks, or edges that are too thin to sharpen properly. Quality replacement blades ensure continued good performance.
Creative Applications and Recipe Ideas
Custom Meat Blends
Create signature burger blends by combining different cuts with varying fat contents. Try mixing chuck roast with short ribs and sirloin for complex flavor profiles that rival any restaurant burger.
Experiment with different ratios to find your perfect blend. Start with 60% chuck, 20% short ribs, and 20% sirloin, then adjust based on your taste preferences and desired fat content.
Document successful blends so you can recreate them consistently. Note the cuts used, proportions, and grinding techniques that produced the best results.
International Cuisine Applications
Fresh ground lamb mixed with traditional spices creates authentic Middle Eastern dishes like kofta and kibbeh. The ability to control fat content and freshness makes homemade versions superior to store-bought options.
Italian sausages benefit enormously from freshly ground pork shoulder mixed with fennel, garlic, and other traditional seasonings. Control the coarseness and fat content to match regional variations.
Asian cuisine applications include fresh ground pork for dumplings, wontons, and meatballs. The fine texture control possible with home grinding creates superior results for these delicate dishes.
Storage and Preservation
Short-term Storage
Use freshly ground meat within 24 hours for optimal quality and safety. Ground meat has much more surface area exposed to air than whole cuts, making it more perishable and susceptible to bacterial growth.
Store ground meat in the coldest part of your refrigerator, typically the bottom shelf toward the back. Keep it in airtight containers or well-wrapped to prevent exposure to air and cross-contamination.
Label containers with the grinding date and meat type to track freshness. This becomes especially important when grinding multiple batches or different types of meat.
Freezing Ground Meat
Freeze ground meat in portion-sized packages for convenient use later. Flat packages freeze faster and thaw more evenly than thick, bulky shapes. Consider your typical recipe quantities when portioning.
Remove as much air as possible from packaging to prevent freezer burn. Vacuum sealing provides the best protection, but careful wrapping with freezer paper or plastic wrap also works well.
Use frozen ground meat within 3-4 months for best quality. While it remains safe longer when properly frozen, the texture and flavor begin to deteriorate after this timeframe.
Conclusion
Grinding your own meat at home opens up a world of culinary possibilities while giving you complete control over quality, freshness, and ingredients. The investment in a good meat grinder pays dividends in better-tasting food, cost savings, and the satisfaction of creating something from scratch.
Master the basic techniques outlined in this guide, then experiment with different cuts, fat ratios, and textures to discover your preferences. Remember that proper temperature control, sharp blades, and good sanitation practices form the foundation of successful meat grinding.
Start with simple projects like burger meat or Italian sausage, then expand your skills to more complex applications as you gain experience. The key lies in understanding how different variables affect the final product and adjusting your technique accordingly.
Fresh ground meat transforms ordinary meals into extraordinary experiences. Take the time to learn proper grinding techniques, and you’ll never want to go back to store-bought ground meat again. Your taste buds – and your family – will thank you for the effort.