How to Keep Food Hot While Traveling?
Road trips, long commutes, and outdoor adventures often leave us craving hot, satisfying meals. Cold sandwiches and room-temperature snacks can only satisfy hunger for so long. The good news is that keeping your food piping hot during travel is entirely possible with the right techniques and equipment.
Millions of travelers face this challenge daily, from busy professionals who want to enjoy a warm lunch at their desk to families embarking on cross-country adventures. This comprehensive guide will show you exactly how to maintain food temperature, prevent spoilage, and enjoy delicious hot meals wherever your journey takes you.
Why Temperature Matters When Traveling with Food
Food safety becomes critical when you’re away from home. Bacteria multiply rapidly in the temperature danger zone between 40°F and 140°F. Hot foods need to stay above 140°F to remain safe for consumption, while cold foods must stay below 40°F.
Beyond safety concerns, nobody wants to eat lukewarm soup or cold pasta. Hot food simply tastes better and provides the comfort we crave during long journeys. The psychological impact of a warm meal can transform a stressful travel day into a more enjoyable experience.
Temperature retention also affects food texture and flavor. Hot foods lose their appeal when they cool down, becoming greasy, congealed, or unappetizing. Proper heat retention preserves the intended taste, aroma, and mouthfeel of your carefully prepared meals.
Essential Equipment for Keeping Food Hot
Thermal Containers and Insulated Bags
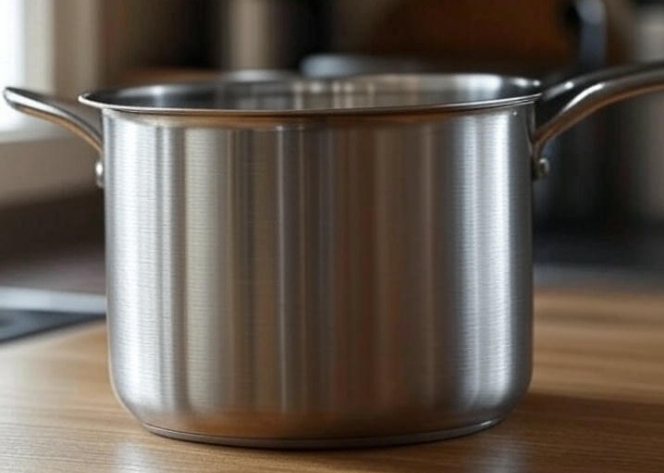
Vacuum-sealed thermal containers represent the gold standard for portable food storage. These containers use double-wall construction with a vacuum between the walls, preventing heat transfer through conduction and convection. High-quality thermal containers can maintain food temperature for 6-8 hours or more.
Look for containers with wide mouths for easy filling and cleaning. Stainless steel construction offers superior durability and heat retention compared to plastic alternatives. Some models feature collapsible designs that save space when not in use.
Insulated food bags provide another excellent option for transporting multiple containers. These bags often include separate compartments for different food items and can accommodate various container sizes. The best insulated bags feature multiple layers of insulation and waterproof exteriors.
Portable Food Warmers
Electric food warmers plug into your car’s 12-volt outlet and actively maintain food temperature. These devices work particularly well for longer trips where passive insulation might not suffice. Many models include temperature controls and automatic shut-off features for safety.
Some food warmers come with removable containers that you can take directly to your table. Others feature heating plates that warm containers placed on top. Consider your specific needs when choosing between these options.
Battery-powered food warmers offer flexibility when electrical outlets aren’t available. These devices typically provide 2-4 hours of heating time per charge. They work best for shorter trips or as backup heating solutions.
Heat Packs and Chemical Warmers
Disposable heat packs provide an inexpensive way to add warmth to your food containers. These packs activate when exposed to air and can provide heat for several hours. Place them around your food containers inside insulated bags for maximum effectiveness.
Reusable heat packs offer an eco-friendly alternative. You can recharge these packs by boiling them in water or using a microwave. They provide consistent heat for 2-4 hours and can be used repeatedly.
Flameless ration heaters, originally developed for military use, can heat entire meals without electricity. These chemical heaters activate when mixed with water and can warm food to serving temperature in 10-15 minutes.
Pre-Travel Food Preparation Strategies
Optimal Cooking and Packing Techniques
Start with food that’s hotter than serving temperature. If you want to eat food at 140°F, cook it to 160°F or higher before packing. This extra heat provides a buffer as temperature naturally decreases during travel.
Preheat your thermal containers by filling them with boiling water and letting them sit for 5-10 minutes. Empty the water and immediately add your hot food. This simple step can extend temperature retention by several hours.
Dense, thick foods retain heat better than thin liquids. Soups, stews, and casseroles stay hot longer than broths or gravies. Consider the consistency of your food when planning travel meals.
Food Selection for Heat Retention
Certain foods naturally maintain temperature better than others. Dishes with high fat content retain heat effectively because fat acts as insulation. Thick sauces and gravies also hold heat well due to their density.
Avoid foods that become unappetizing when they cool down. Fried foods, for example, lose their crispness and become soggy. Focus on foods that taste good at slightly lower temperatures or can be easily reheated.
One-pot meals work exceptionally well for travel. Hearty stews, chili, soup, and pasta dishes maintain their appeal even if they cool slightly. These meals also pack efficiently and create less mess during transport.
Step-by-Step Packing Instructions
Layer Your Insulation
Start with a high-quality thermal container or insulated bag as your foundation. Place your hot food container in the center, surrounded by insulation on all sides. Never let the food container touch the outer walls of your carrier.
Wrap individual containers in towels or newspaper for extra insulation. This creates additional air pockets that slow heat transfer. Make sure the wrapping doesn’t interfere with lid closure or create gaps in insulation.
Fill empty spaces with crumpled newspaper, towels, or foam padding. These materials prevent air circulation inside your carrier and maintain consistent temperature throughout the journey.
Seal and Secure Everything
Check that all container lids fit tightly to prevent heat loss and spills. Loose lids allow hot air to escape and cold air to enter, dramatically reducing temperature retention time.
Use rubber bands or clips to secure lids if necessary. This prevents accidental opening during transport and maintains the seal integrity.
Close your insulated bag or cooler firmly and avoid opening it unnecessarily. Each time you open the container, warm air escapes and cold air enters, reducing the internal temperature.
Travel-Specific Considerations
Car Travel Solutions
Your car provides several advantages for keeping food hot. The 12-volt outlet allows you to use electric food warmers throughout your journey. Some travelers place insulated containers on the floor near heating vents for additional warmth.
Avoid placing food containers in direct sunlight, as this can cause uneven heating and potential spoilage. Instead, find shaded areas of your vehicle that maintain consistent temperatures.
Consider the duration of your trip when planning. For journeys under 4 hours, good thermal containers should suffice. Longer trips may require electric warmers or heat packs for optimal results.
Air Travel Restrictions
Airport security rules limit your options for keeping food hot during flights. You cannot bring heat packs or chemical warmers in carry-on luggage. Electric food warmers must be packed in checked baggage.
Focus on high-quality thermal containers that can maintain temperature for the duration of your flight plus travel time to and from airports. Vacuum-sealed containers work best for air travel.
Pack hot food immediately before leaving for the airport. The shorter the time between packing and eating, the better your chances of enjoying warm food at your destination.
Outdoor Adventures and Camping
Camping trips and outdoor adventures present unique challenges for food temperature maintenance. Without access to electricity or microwaves, you must rely on passive insulation and heat packs.
Campfire cooking allows you to reheat food if it cools down. Pack foods that can be easily warmed over an open flame or camping stove. Soups, stews, and one-pot meals work particularly well for outdoor dining.
Consider solar-powered food warmers for extended outdoor trips. These devices harness sunlight to maintain food temperature and work well in sunny conditions.
Troubleshooting Common Problems
When Food Cools Too Quickly
If your food cools faster than expected, check your container’s seal integrity. Loose lids or damaged seals allow heat to escape rapidly. Replace faulty containers or use tape to improve seal quality.
Insufficient insulation often causes rapid cooling. Add more towels, newspapers, or foam padding around your food containers. Create a complete thermal barrier between your food and the outside environment.
External temperature extremes can overwhelm even good insulation. In very cold conditions, consider using heat packs or electric warmers to maintain temperature. Hot weather can actually help maintain food temperature longer.
Safety Concerns and Solutions
Never eat food that has been in the temperature danger zone (40°F-140°F) for more than 2 hours. Use a food thermometer to check temperature if you’re unsure. When in doubt, throw it out.
Reheat cooled food to 165°F before eating if possible. This kills any bacteria that may have developed during cooling. Portable camping stoves or car outlets can provide reheating options.
Pack perishable foods with extra ice or heat packs to maintain safe temperatures. The investment in proper temperature control is worth avoiding foodborne illness during your travels.
Advanced Techniques for Extended Trips
Multi-Day Food Storage
Extended trips require more sophisticated planning and equipment. Consider investing in high-capacity thermal containers or multiple smaller containers for different meals.
Rotate your food containers, eating items with shorter temperature retention first. This prevents waste and ensures you always have the safest options available.
Plan meal preparation stops where you can cook fresh food and reload your thermal containers. This strategy works well for multi-day road trips with kitchen access.
Professional-Grade Equipment
Commercial food service equipment offers superior performance for serious travelers. Professional thermal containers can maintain temperature for 12+ hours and handle larger quantities of food.
Heated food cabinets designed for catering provide restaurant-quality temperature control. These units require significant power but offer unmatched performance for group travel or extended trips.
Consider renting or purchasing commercial equipment for special occasions like large group trips or extended camping expeditions. The improved food quality and safety may justify the additional expense.
Budget-Friendly Alternatives
DIY Solutions
Create your own thermal container using a small cooler and hot water bottles. Fill the bottles with boiling water and surround your food containers with them inside the cooler.
Newspaper provides excellent insulation at minimal cost. Wrap food containers in multiple layers of newspaper and place them in any available bag or box.
Towels and blankets can substitute for expensive insulation materials. Wrap your food containers thoroughly and pack them tightly to prevent air circulation.
Repurposing Household Items
Large thermoses can hold soups, stews, and other liquid-based foods effectively. These containers often provide better temperature retention than regular food containers.
Slow cooker inserts work well for transporting hot foods. Wrap them in towels and place them in insulated bags for extended temperature retention.
Mason jars with tight-fitting lids can hold individual portions of hot food. These work particularly well for soups and beverages.
Conclusion
Keeping food hot while traveling requires the right combination of equipment, preparation, and technique. Start with high-quality thermal containers and proper insulation. Prepare your food at higher temperatures and pack it immediately for best results.
Remember that food safety should always be your top priority. Use thermometers to check temperatures and don’t take risks with potentially spoiled food. With proper planning and the right equipment, you can enjoy hot, delicious meals wherever your travels take you.
The key to success lies in understanding heat transfer principles and applying them practically. Invest in quality equipment that matches your travel style and food preferences. Practice your techniques at home before embarking on important trips.
Whether you’re planning a cross-country road trip, a camping adventure, or simply want to enjoy a hot lunch at work, these strategies will help you maintain food temperature and safety. Your taste buds and your stomach will thank you for the extra effort.