
How To Use a Cheese Slicer?
Cheese slicers transform the way you prepare and serve cheese at home. These simple yet effective tools help you create perfectly uniform slices every time, making your cheese boards look professional and your sandwiches taste better. Learning to use a cheese slicer properly will save you time in the kitchen while ensuring consistent results.
Many home cooks struggle with cutting cheese evenly using regular knives. The cheese crumbles, creates uneven pieces, or becomes a messy affair. A dedicated cheese slicer solves these problems instantly. This comprehensive guide will teach you everything about using different types of cheese slicers, maintaining them, and getting the best results every time.
Different Types of Cheese Slicers and Their Uses
The Norwegian-style slicer remains the most popular type worldwide. This handheld tool features a flat metal surface with a slot and an adjustable wire or blade. The design allows you to control slice thickness by adjusting the wire position. Norwegian slicers work exceptionally well with semi-hard cheeses like Gouda, Cheddar, and Edam.
Wire cheese slicers use a thin metal wire stretched across a frame to cut through cheese. These slicers excel at cutting soft to medium-hard cheeses. The wire creates clean cuts without dragging or tearing the cheese surface. Many wire slicers come with replacement wires since they can break with heavy use.
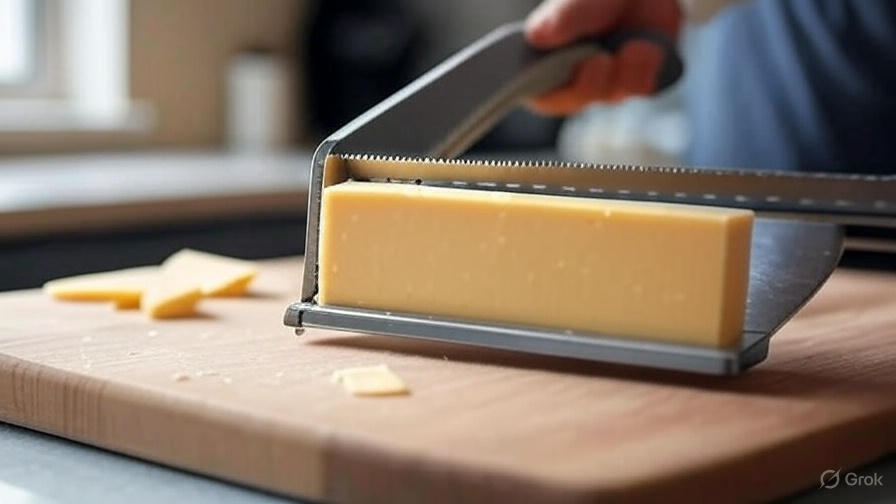
Plane-style cheese slicers resemble small hand planes used in woodworking. They feature a sharp blade positioned at an angle within a metal housing. You drag the slicer across the cheese surface, and the blade shaves off thin, even slices. These work particularly well with hard cheeses like Parmesan and aged Cheddar.
Electric cheese slicers bring commercial-grade precision to home kitchens. These machines use rotating blades to create perfectly uniform slices at adjustable thicknesses. Professional chefs and serious home cooks prefer electric slicers for large-scale cheese preparation or when consistency is crucial.
Adjustable cheese slicers allow you to modify the thickness of your slices on the fly. A simple mechanism lets you move the cutting element closer or farther from the base plate. This versatility makes them perfect for households that enjoy various cheese types and serving styles.
Step-by-Step Instructions for Using a Hand-Held Cheese Slicer
Start by preparing your cheese properly. Remove the cheese from refrigeration 15-20 minutes before slicing. Room temperature cheese slices more easily and produces cleaner cuts. Cold cheese tends to crack or crumble, especially harder varieties.
Hold the cheese firmly with your non-dominant hand. Position your fingers away from the cutting area to avoid accidents. Grip the cheese block securely but avoid squeezing too hard, which can cause soft cheeses to deform.
Grasp the cheese slicer handle with your dominant hand. Place the slicer at one edge of the cheese block, ensuring the cutting wire or blade makes contact with the surface. The slicer should sit flat against the cheese with no tilting or angling.
Apply gentle, steady pressure as you draw the slicer across the cheese surface. Move in one smooth motion from one edge to the other. Avoid stopping mid-slice, which can create uneven cuts or cause the cheese to tear. Let the slicer do the work rather than forcing it through the cheese.
Clean the slicer blade between cuts if cheese starts accumulating on the surface. Soft cheeses tend to stick to the cutting element, which can affect subsequent slices. A quick wipe with a damp cloth keeps the blade clean and functional.
Repeat the slicing process, maintaining consistent pressure and speed. Stack the slices carefully to prevent breaking or sticking together. For presentation purposes, slightly overlap the slices on your serving plate or cheese board.
Techniques for Different Cheese Types
Hard cheeses like aged Cheddar, Parmesan, and Pecorino require specific techniques. Use firm, confident strokes with your cheese slicer. The density of these cheeses means you need more pressure to achieve clean cuts. Let the cheese reach room temperature before slicing to prevent cracking.
Semi-hard cheeses such as Gouda, Swiss, and Gruyere slice beautifully with moderate pressure. These cheeses have the ideal texture for most cheese slicers. Draw the slicer smoothly across the surface without rushing. The natural oils in semi-hard cheeses help the slicer glide easily.
Soft cheeses present unique challenges but respond well to proper technique. Brie, Camembert, and fresh mozzarella need gentle handling. Use light pressure and clean the slicer frequently to prevent cheese buildup. Consider chilling soft cheeses briefly before slicing if they become too soft to handle.
Crumbly cheeses like feta, blue cheese, and aged goat cheese require extra care. Support the cheese block with both hands when possible. Use short, gentle strokes rather than trying to slice across the entire block in one motion. Accept that some crumbling is natural with these cheese types.
Processed cheeses slice easily with any type of cheese slicer. American cheese, cheese singles, and similar products maintain their shape well during slicing. These cheeses work perfectly for practicing your slicing technique before moving to more expensive artisanal varieties.
Maintaining Your Cheese Slicer for Best Results
Clean your cheese slicer immediately after each use. Cheese residue hardens quickly and becomes difficult to remove once dried. Use warm soapy water and a soft brush to clean all surfaces thoroughly. Pay special attention to the cutting element where cheese tends to accumulate.
Hand washing proves safer and more effective than dishwasher cleaning for most cheese slicers. The high heat and harsh detergents in dishwashers can damage handles, loosen connections, or dull blades. Take a few extra minutes to wash by hand for longer tool life.
Dry your cheese slicer completely before storing. Moisture trapped in crevices or joints can lead to rust formation, especially on models with metal components. Use a clean towel to dry all surfaces, then allow air drying for several minutes before putting away.
Store cheese slicers in a dry location away from other kitchen tools. Drawer storage works well if you have dedicated space. Wall-mounted holders keep slicers easily accessible while protecting the cutting elements from damage. Avoid storing slicers loose in crowded drawers where they can get damaged.
Replace worn cutting elements promptly. Dull blades or stretched wires produce poor results and require more pressure, increasing the risk of accidents. Most manufacturers sell replacement parts, making repairs simple and cost-effective.
Sharpen plane-style cheese slicer blades periodically. Use a fine sharpening stone or honing steel designed for kitchen knives. Maintain the original blade angle and work slowly to avoid removing too much metal. Sharp blades produce cleaner cuts with less effort.
Common Mistakes to Avoid When Slicing Cheese
Using too much pressure ranks as the most common mistake. Excessive force can cause cheese to crack, crumble, or produce uneven slices. Let the slicer’s design do the work while you provide gentle guidance. Light, consistent pressure produces the best results across all cheese types.
Slicing cold cheese straight from the refrigerator creates numerous problems. Cold cheese resists cutting, leading to cracked or broken slices. The extra effort required can damage your slicer or cause accidents. Always allow cheese to warm to room temperature before slicing.
Neglecting to clean the slicer between different cheese types can transfer flavors and create messy results. Strong-flavored cheeses like blue cheese or aged varieties can overpower milder options. A quick rinse prevents flavor contamination and keeps your slicer performing optimally.
Rushing through the slicing process leads to uneven results and potential injuries. Take your time to position the slicer correctly, apply appropriate pressure, and complete each cut smoothly. Hurried slicing often requires do-overs, wasting time and cheese.
Using the wrong slicer type for your cheese causes frustration and poor results. Wire slicers struggle with very hard cheeses, while plane slicers may not work well with soft varieties. Match your slicer to your cheese type for optimal performance.
Storing cheese slicers improperly leads to damage and shortened tool life. Throwing slicers into crowded drawers can bend wires, chip blades, or damage handles. Proper storage protects your investment and ensures reliable performance.
Advanced Tips for Professional-Looking Results
Create presentation-worthy cheese slices by paying attention to thickness consistency. Practice maintaining steady pressure and speed to achieve uniform results. Professional chefs recommend starting with less expensive cheeses while developing your technique.
Arrange sliced cheese attractively on serving plates or boards. Slightly overlapping slices creates visual appeal while making efficient use of space. Fan arrangements work well for round cheese slices, while rectangular slices look best in neat rows.
Temperature control extends beyond just warming cheese before slicing. In hot weather, briefly chill your cheese slicer to prevent soft cheeses from sticking. Cold metal surfaces reduce cheese adhesion and produce cleaner cuts.
Plan your slicing order when preparing multiple cheese types. Start with the mildest flavors and progress to stronger varieties. This prevents flavor transfer and maintains the distinct character of each cheese type.
Use parchment paper between cheese slices when stacking for storage. This prevents slices from sticking together while maintaining freshness. Vacuum sealing sliced cheese extends shelf life significantly compared to traditional wrapping methods.
Experiment with slice thickness to enhance different serving styles. Thin slices work well for crackers and sandwiches, while thicker cuts suit wine pairings and standalone tasting. Adjust your technique based on intended use.
Troubleshooting Common Problems
Cheese sticking to the slicer blade indicates insufficient cleaning or inappropriate cheese temperature. Clean the blade thoroughly and ensure your cheese has reached proper temperature before slicing. A light coating of neutral oil on the blade can help with particularly sticky cheeses.
Uneven slice thickness usually results from inconsistent pressure or slicer positioning. Focus on maintaining steady hand position and uniform pressure throughout each cut. Practice with inexpensive cheese until your technique becomes natural.
Wire breakage on wire-style slicers occurs from excessive pressure or cutting inappropriate cheese types. Replace broken wires immediately and adjust your technique to use lighter pressure. Consider switching to a different slicer type for very hard cheeses.
Crumbling cheese often indicates the cheese is too cold or the slicer needs maintenance. Allow proper warming time and ensure your cutting element is sharp and clean. Some cheese types naturally crumble regardless of technique.
Difficulty cutting through cheese suggests a dull blade or inappropriate slicer type. Sharpen or replace cutting elements as needed. Verify that you’re using the correct slicer type for your specific cheese variety.
Cheese tears instead of cutting cleanly when the blade is dull or you’re moving too quickly. Slow down your cutting motion and check blade sharpness. Replace or sharpen cutting elements to restore proper performance.
Safety Considerations and Best Practices
Keep your fingers away from cutting areas at all times. Cheese slicers use sharp blades or wires that can cause serious injuries if handled carelessly. Maintain proper grip positions and never attempt to guide cheese with your fingers near the cutting element.
Work on stable, non-slip surfaces to prevent accidents. Place a damp towel under your cutting board to prevent sliding. Stable work surfaces allow better control and reduce the risk of slips that could cause injuries.
Never attempt to catch a falling cheese slicer. Sharp cutting elements can cause severe cuts if you try to grab a dropped tool. Step back and let it fall safely, then pick it up carefully once it’s stationary.
Store cheese slicers safely away from children and in locations where they won’t fall unexpectedly. Magnetic strips or dedicated holders work better than loose drawer storage. Proper storage prevents accidents and protects the tool.
Inspect your cheese slicer regularly for damage or wear. Loose handles, bent wires, or chipped blades can cause accidents or poor performance. Address maintenance issues promptly rather than continuing to use damaged equipment.
Use appropriate lighting when slicing cheese. Good visibility helps you maintain proper technique and avoid accidents. Position your work area near a window or under adequate artificial lighting.
Conclusion
Mastering cheese slicer techniques transforms your kitchen skills and enhances your cheese presentation. The key lies in matching the right slicer type to your cheese varieties, maintaining proper technique, and keeping your tools in excellent condition. Practice with different cheese types builds confidence and improves results over time.
Remember that great cheese slicing combines the right equipment with proper technique and patience. Start with basic skills and gradually tackle more challenging cheese varieties as your expertise grows. With consistent practice and attention to detail, you’ll soon slice cheese like a professional chef.
Your investment in learning proper cheese slicer techniques pays dividends in better-looking presentations, reduced waste, and enhanced enjoyment of your favorite cheeses. Take time to master these skills, and you’ll never struggle with uneven cheese slices again.